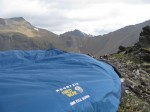
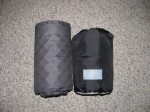
Down Sleeping bags have come a long way in the last few years and with the advancements in outer shells, and water proof breathable membranes we have available now, down sleeping bags make a great choice for the backpack hunter because... … [Read more...] about Mountain Hardwear Banshee SL 0 Down Sleeping Bag Review
Havalon Piranta Skinning/Caping Knife Review
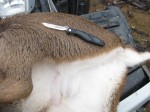
Properly skinning and caping your game is a critical part of preserving your trophy should you wish to have it mounted by your taxidermist. Aside from practice and skill, the only tool that will help you do a better job is a razor sharp knife designed for the purpose of skinning and caping game. … [Read more...] about Havalon Piranta Skinning/Caping Knife Review
Best Hunting Boot Wax – Obenhaufs Heavy Duty LP
If you've spent the big bucks for an excellent set of leather mountain hunting boots, don't cheap out when it comes to treating and preserving your boot leather. There are just as many if not more leather preservatives and treatments out there then there are boot makers, so knowing which one is the best will help insure you get many miles of … [Read more...] about Best Hunting Boot Wax – Obenhaufs Heavy Duty LP
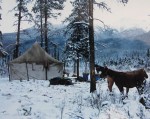
Care & Cleaning Of Your Backpack Hunting Gear

What do you do with all of your hunting gear when you get back from a long trip? Do you throw it all in the corner somewhere until you're ready to deal with it or do you spend the time to properly clean and maintain every piece of gear you have? Here's a short checklist of things you should be doing to make sure your backpack hunting gear stays … [Read more...] about Care & Cleaning Of Your Backpack Hunting Gear
eVent Rain Gear Review – Integral Designs “Thru” Hiker & Pants
Integral Designs eVent Rain Gear Review A few months ago, I received a brand new set of Integral Designs rain gear courtesy of Evan Jones, (Previous owner of Integral Designs) in exchange for some advertising on our website, I promised a detailed review after I'd used the products enough and felt confident enough to give some honest feedback. … [Read more...] about eVent Rain Gear Review – Integral Designs “Thru” Hiker & Pants
Exped Downmat 7 Review – Backpack Sleeping Mattress
Exped Downmat 7 Sleeping Pad Review I am no stranger to insulated sleeping mats, and have been using thermarests for many, many years. I actually have one of the "original" Thermarests from the early 90's and it's still in use... They truly are excellent sleeping pads. I honestly never thought the day would come that I would willingly give up … [Read more...] about Exped Downmat 7 Review – Backpack Sleeping Mattress
Valandre Bloody Mary Review – Down Sleeping Bag
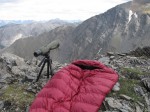
A Great Down Sleeping Bag For Sheep And Mountain Hunting After spending too many cold and uncomfortable nights in my old Sierra Designs synthetic sleeping bag, it was clear that I needed to expand my horizons with regards to the new sleeping bags that are on the market now. Down Sleeping Bags have come a long way and now thanks to superior … [Read more...] about Valandre Bloody Mary Review – Down Sleeping Bag
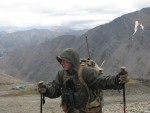
Sheep Hunting Gear List – Updated 2010 List
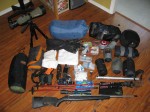
Backpack Sheep Hunting Gear List A few years ago I put out the first version of my backpack sheep hunting list, after a few more trips and miles on the trail I've upgraded some gear and refined the list a little more. This list isn't the be-all-end-all of sheep hunting gear lists but it's a good start, I may have missed a few items and will add … [Read more...] about Sheep Hunting Gear List – Updated 2010 List
Integral Designs eVent “Thru Hiker” Rain Jacket And Pants Review
Those familiar with hardcore outdoor gear are already familiar with the name "Integral Designs" so they should need no introduction... eVent on the other hand is likely something you've never heard about and it's one of the little outdoor "secrets" that is starting to make some noise. We'll learn more about eVent in a little bit. … [Read more...] about Integral Designs eVent “Thru Hiker” Rain Jacket And Pants Review
Katadyn Vario Review – Water Filter For Mountain Hunting
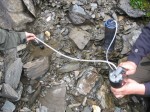
Katadyn Vario Water Filter Review Normally, I have never carried an actual water filter with me on any of my mountain hunting trips. We've been drinking water out of the Northern BC mountains for years, actually decades, without ever experiencing a problem. The last few years I've brought along the pristine drops but they aren't all that good … [Read more...] about Katadyn Vario Review – Water Filter For Mountain Hunting
